Ghost of Tsushima will release worldwide in a few hours and as for us? We loved every moment of it as you can see in our review. It’s not the easiest game out there, and you can get chopped down in a couple of hits if you’re not careful.
Mild Spoiler Alert – some of these tips will reference content during the later parts of the game.
Here are some tips to help you take the fight back to the Mongols and reclaim the island of Tsushima!
Familiarize yourself with the different stances and use them well
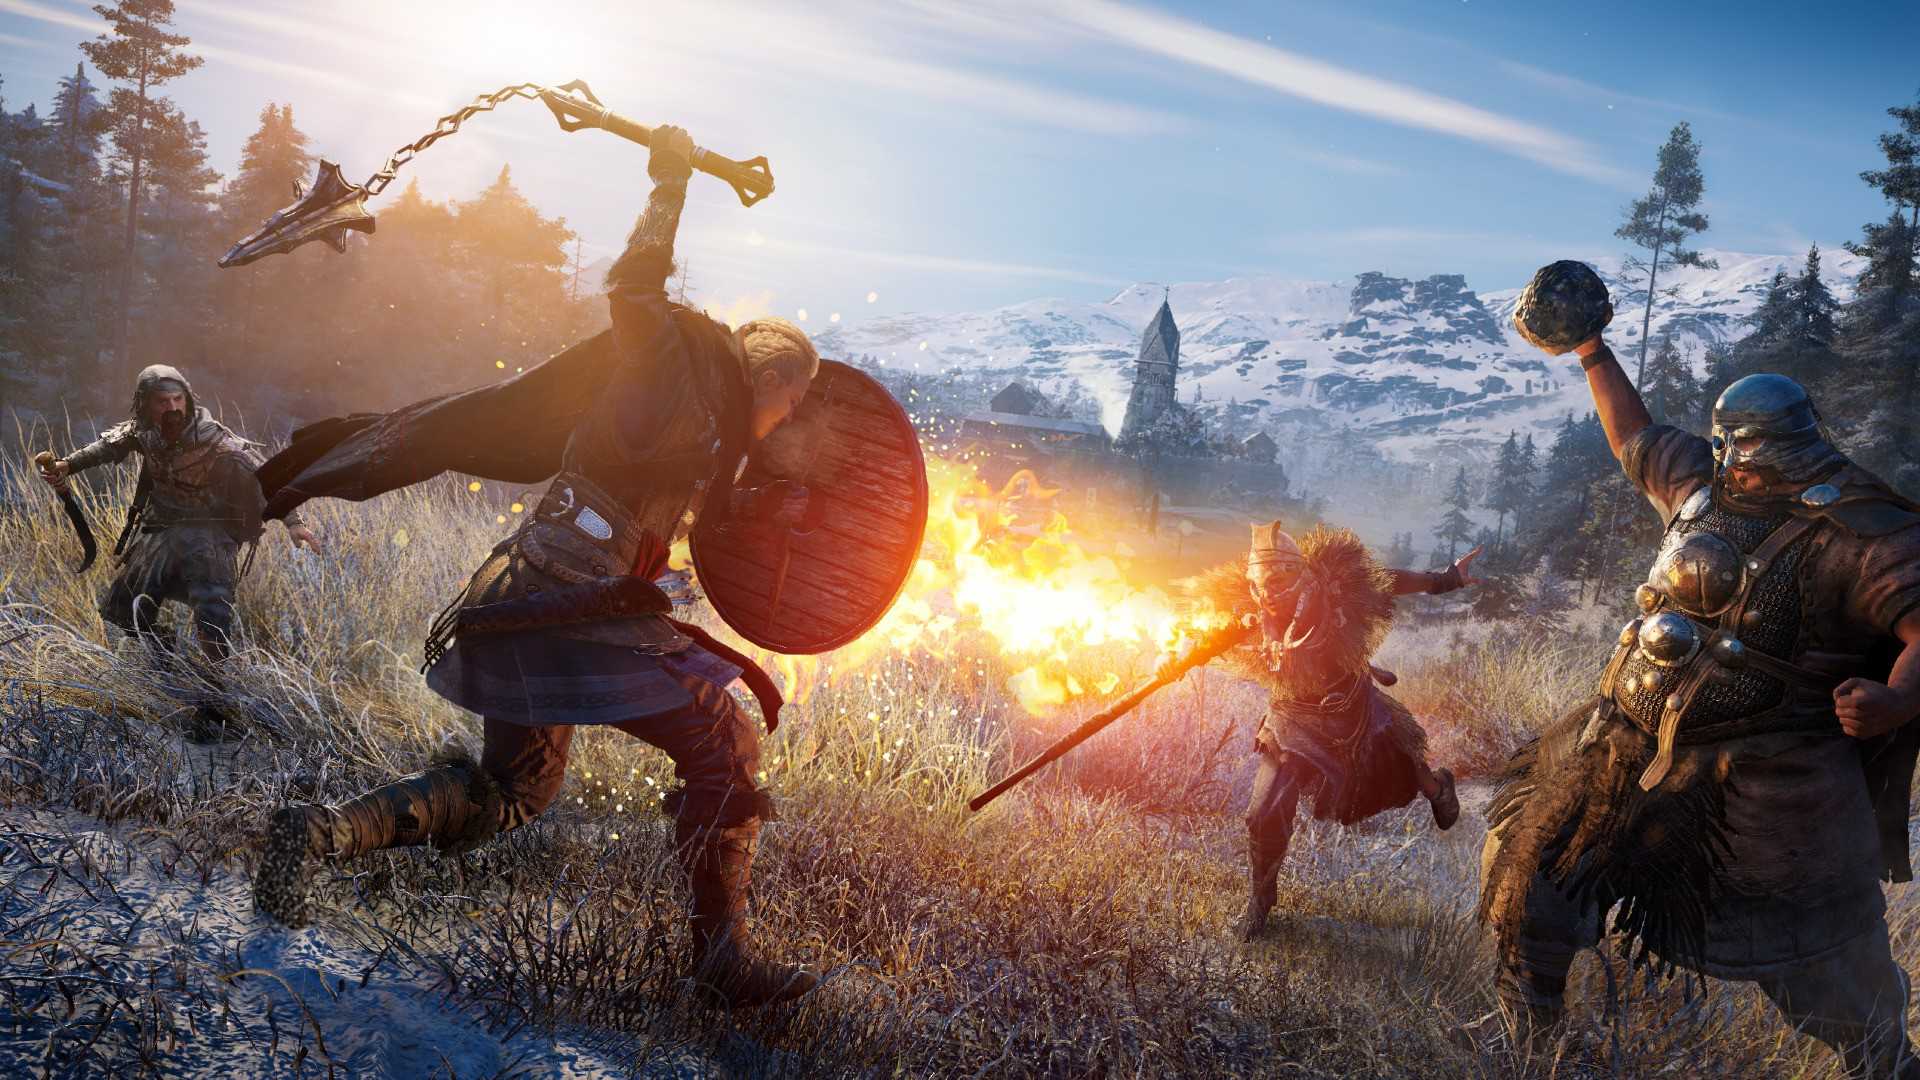
Stances are not there just for show, they actually make the fight so much easier when facing certain enemies. You’ll be faced up with foes of different styles and there is a stance that will suit each one.
No one is stopping you from using the Stone stance for every enemy in the game, just be ready for a tough time against everybody else who isn’t using a sword. Getting the feel of switching stances on the fly will be key to winning the later engagements in the game.
Later in the game, these enemies will block more and will parry your attacks and to get through, you’ll need to stagger them and break their defense, which will take just a couple of hits if you are using the proper stance. Pair that with equipment that increases stagger damage like Gosaku’s armor and you’re well on your way to mowing everybody down.
Also, you can both Observe AND kill the Mongol leaders scattered throughout the map, meaning you can unlock that next stance twice as fast!
When fighting multiple enemies, take down archers first
The game will ease you in, fighting a manageable number of enemies at first. After that, you’ll need to survive against wave after wave of attacks, sometimes dealing with more than 5 enemies at once. And then there are Archers.
Archers will break your momentum and are an added thing to worry about when fighting against a big group of enemies. You can dodge their attacks due to an indicator, but wouldn’t you just want to take them out of the equation first?
When engaging a big group, always look for the archers first. It’ll only take a couple of hits to dispose of them, and in turn will make your fight that much easier. Whoever you deal with next will be up to you.
In a pinch, remember to use your Kunai’s and Smoke Bombs
During a fight, you might be so focused that you forget you have tools with you, or ‘Ghost Weapons’ as the game calls them. Use them as much as you can, because ammo is abundant in the game and they make the fight so much easier.
We recommend upgrading the smoke bombs because they can serve as your panic button when things go south. If you’re close to death, a well timed smoke bomb will either let you assassinate the enemies caught in the blast or let you escape and fight another day. At the same time, if you are low on health, the highest smoke bomb upgrade can heal you, giving you that second chance at vengeance.
Plan your ‘Charm’ loadout well
You can get charms from finishing up quests, or ‘Tales’ as the game calls it and soon enough, you’ll have more than you can actually equip. Getting these charms is one thing, equipping a full loadout is another.
One of the things you’ll have to do is to look for Fox Den’s. Finding enough will open up your charm slots, allowing you to equip up to a total of 6.
The other thing you’ll want to think of is your style of play. Planning to be the silent killer all the way? Equip charms that increase your stealth capabilities but don’t stop there, equip the proper armor set as well for max effectiveness. Taking too much damage during fights? Equip charms that improve damage reduction. There are a lot of charms to equip and they lend themselves to various playstyles that will suit your needs.
On a full loadout, it would take more than 8-10 hits to actually kill you with the proper charms equipped instead of 3 or 4.
Spend technique points on the chain assassination skills and on the deflect skill tree first
Chain assassinations are lovely, as they allow you to take out multiple enemies at once without breaking a sweat. At its max upgrade, you’ll be able to kill off 3 enemies that are close together instead of taking each one in a drawn out fight.
At some point you will need to fight head on, and you have to be prepared with the proper skills to do so. As early as you can, take up the skills that will allow you to parry ‘Blue’ attacks as this will prove to be very useful against enemies with spears. Also get that skill that allows you to roll out of danger, in fact, make it your first technique!
Your bow is there for a reason, use it
As mentioned earlier, ammo is abundant and for the most part, you’ll be able to carry anywhere from 10-12 arrows depending on how much you upgrade your ammo capacity. That’s potentially 10-12 Mongols you can kill from distance without getting your hands dirty.
Your bow can also trigger environmental hazards which can take out groups of enemies if you’re smart about it. Always look for braziers and red barrels to get more value out of your single arrow.
Remember, your sword doesn’t have to always do the talking. Most of the time, your bow may have something to say as well.