Control Ultimate Edition, may be a brief game, but it is a well-established world. Sadly, that world you find yourself in is a really massive office building. You’ve probably gotten the hang with office life at this point, and if you wanna be the boss, you better start acting like one. Just in case you haven’t, check out our guide to get you started on the game.
This guide outlines some of the post-endgame extras you have to deal with, and that includes some secret bosses. They’re not that difficult to find nor fight, and frankly, fighting off a swarm is much more difficult.
As you progress in the game, we recommend an energy-based build with a focus on the launch skill. Shield is useful as a last resort, but with a run and gun type of game play, you’re better off with a glass cannon build. Higher energy means more in the tank to throw debris and recharge just as fast to throw more debris.

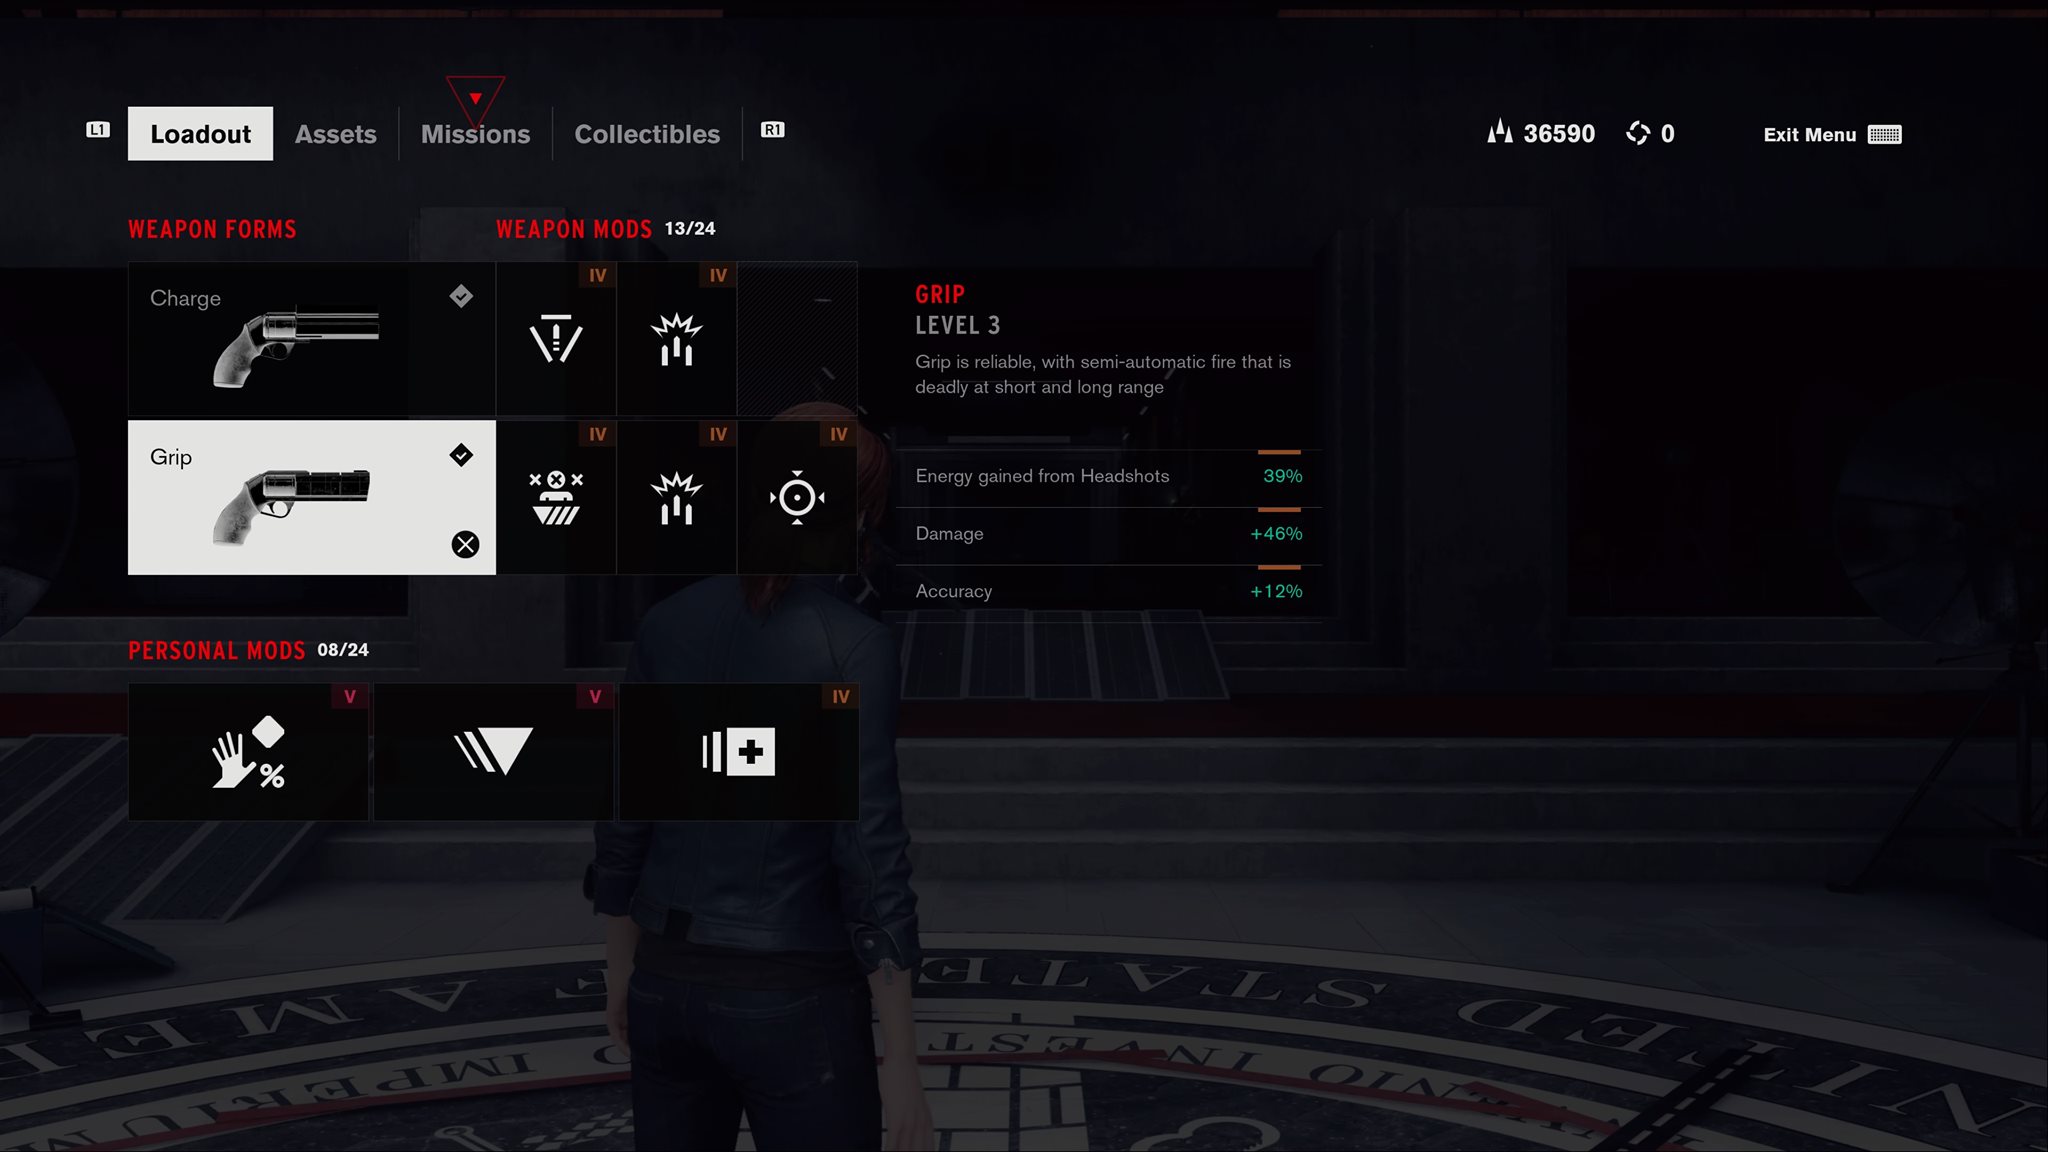
On the base game without the DLC content, you have five variants of your Service Weapon. In order to max out its level so you can equip more mods and increase its output, you will need the ultra rare material called Untapped Potential. Only these secret bosses seem to possess them as only one will be given during the main quest line. This is the reason why we recommend defeating these bosses.
As I said, they’re not that difficult, but they’re necessary to power up your load out.
Anchor
You receive the side mission The Enemy Within after completing A Matter of Time side mission. When you return to the Sealed Threshold Corridor, enter the Safe Room where you’ll find a floating Anchor. To get to this boss, you will need the levitation skill, which you will receive after the main mission My Brother’s Keeper. Once you’re able to levitate, you can reach the floating anchor on the other end of the chasm.
The fight is straightforward: Stay on a platform until you’re able to launch debris into the glowing orb inside its mouth. You have a good two to three seconds to do so before he bombards you with a lot of clocks. (Don’t ask why) It potentially can kill you in two hits. If you aren’t able to launch an item in time, levitate and evade your way into another platform and repeat the pattern until he dies. Make sure you upgrade your Grip sidearm to level three with the Untapped Potential you receive from this boss.
Former
You can face off against Former after taking the quest Fridge Duty when you meet Phillip, an agent who’s been stuck staring at a fridge for a day after the Hiss attacked. (Again, it’s better not to know) After you complete My Brother’s Keeper, you’re able to take on this challenge. Return to the 4th floor on the Panopticon and relieve Phillip of his duties. Sadly, it doesn’t go the way you thought it would (or maybe you were expecting the negative outcome) and you get to face off this cosmic entity.
Former is a lot easier than she looks. Simply shoot from the hip and deflect back some of her eye bombs (you need Launch Enemy Explosives skill). Make sure you kill her fast because when she stomps, she gets rid of the limited platform you’re standing on. If you do die on Former, it’s because of a direct hit, it’s because you run out of ground and I doubt you have enough on the levitate skill to keep you airborne indefinitely.
esseJ
Picking up a note in the Security and Logistics office at the Containment wing of the building triggers the Self Reflection side mission. It involves you circling back to Ritual division’s Mirror testing lab. To open the container, make sure the doors on the left side of the container are opened, opened, and closed and the right side of the container are closed, closed, and opened. Got that? Good, time to fight yourself.
This is a mirror match if there ever was one. Yet, for how cool this fight has been, it’s really not that hard. If you’ve maxed out the Grip form of the Service Weapon, it won’t be too difficult. Once you encounter esseJ at the Research Wing of the Oldest House, you can match her power for power. When she puts up a shield, launch debris to weaken it fast. Keep aiming for head shots.
Her final phase will add levitation to her skill sets, but for some reason she doesn’t dodge. Just keep aiming for the head and launching debris her way. The fight will be over before you know it.
Optional: Former Round Two
Former is such a persistent little girl. You’ll randomly fight this boss during one of the Langston’s Runaways side mission, and receive this mission after completing Fridge Duty. The annoying thing with this second fight is that Former doesn’t even change up her moves. It’s the same fight and you’re probably stronger by now. You can even get fancy by levitating and shooting her from eye level. At this time, your launch damage is now probably doubled, so expect to beat her in record time. You don’t really get an Untapped Potential on this second fight, but the sheer satisfaction of defeating her would do. Or maybe she just wanted to see you… hmmm…
Mold-1
This is one of Emily Pope’s several side missions that she gives you to check up on Doctor Underhill found at the Active Threshold area in the Research Wing. Once you talk to Underhill, you’ll receive the Old Growth side mission. After collecting samples of the mold, you’ll be able to traverse all the growth areas throughout the Oldest House. Finally, you’ll be able to enter The Pit where you’ll find the source of the mold, that’s right… another boss.
This boss is probably the strongest secret boss in the base game in terms of boss level and its ability to one shot you. Ironic thing though is you’re probably stronger by the time you get to this boss if you do every mission. Watch out for the spores it spits out and make sure you launch the exploding rocks at it for the most damage. If you really wanna cheese the damn thing, learn Multi-throw, which allows you to launch up to three of the exploding rocks and lob it at the thing. You don’t even need to go through every head to damage it, pick a head and go nuts.
Mister Tommasi
Remember this guy?
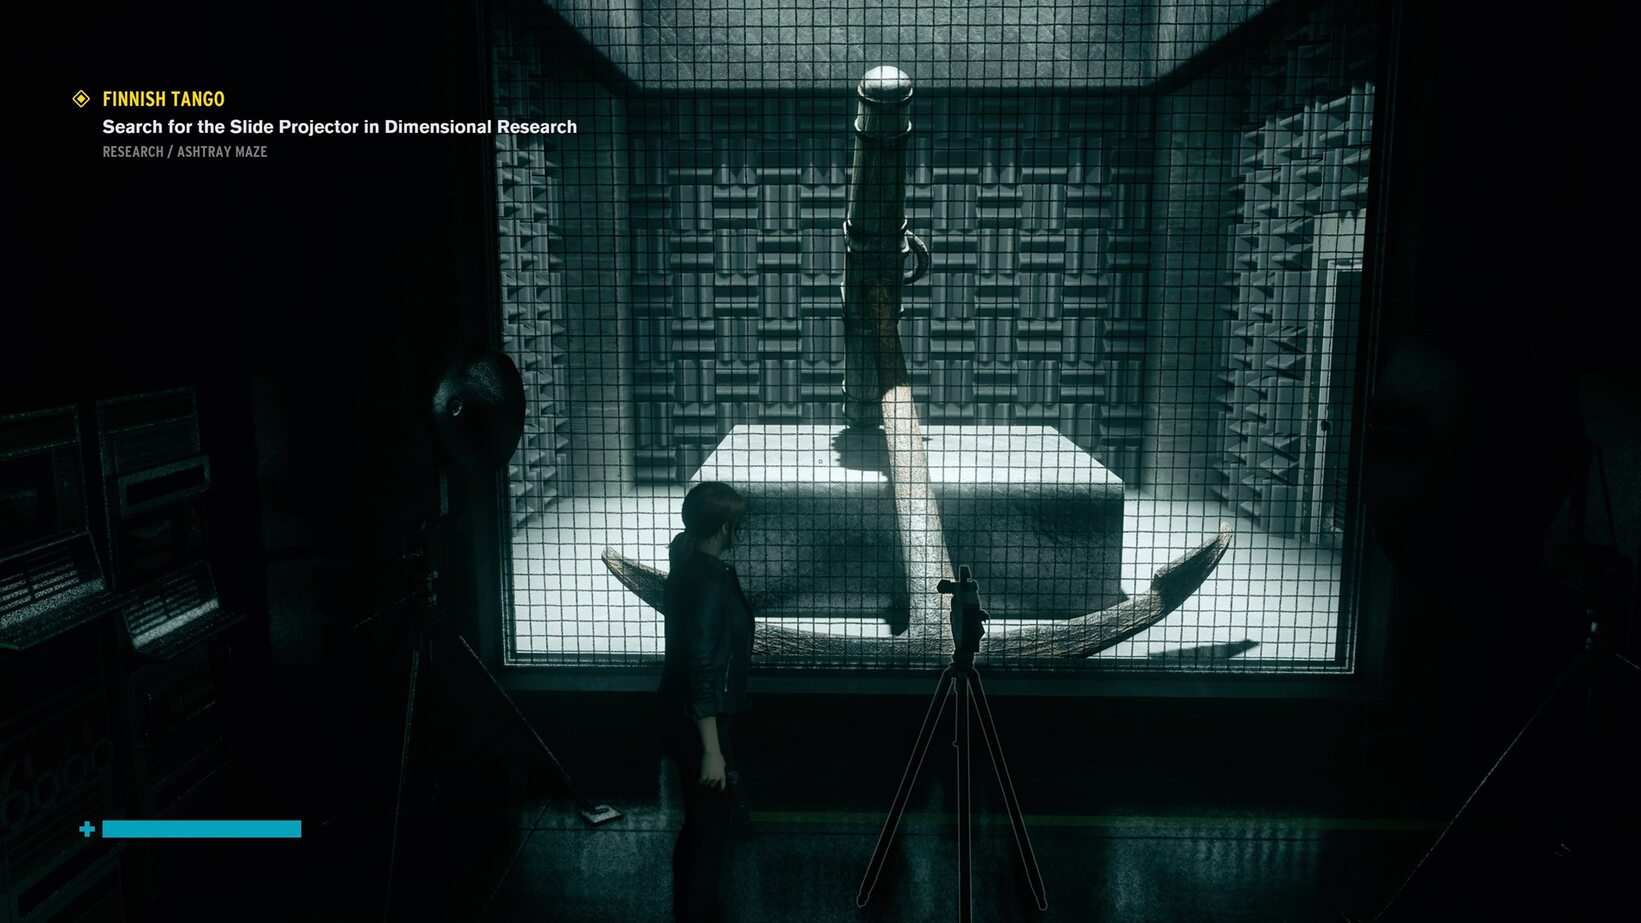
You’ll receive this mission when start the Finnish Tango main mission aptly named Mr. Tommassi. When you’ve completed most of the missions linked to Emily Pope, speak to her at the boardroom and she’ll mention Tommassi’s location. Be prepared though, it is the most difficult fight in this list.
Yeah, you gotta fight him twice. The same strategy from the first fight pretty much works. However, now he’s protected by an energy shield, so he’ll dodge everything you literally throw at him. So on the first phase of the boss fight, get rid of his shield. To make life easier, carry Pierce as a backup weapon and one shot that shield. Once you get his shield down, for some reason he stops dodging. Weird.
The second phase of the boss fight is when he calls his creeps to attack you. It’s not too bad save for the Hiss Distorted, which is at Level 5 and can pretty much one shot you when you have a low health bar. So watch out for that. Tommasi probably put his shield back on, but for some reason, he’s not dodging it at all. So knock that shield out and plug away until he’s dead. Then clean up the rest of his creeps and leave that Hiss Distorted for last.
By the time you complete this boss, you’re able to max out every variant of your Service Weapon to level three. What are you going to use these for now that you’re super imba? The DLCs have enemies that go up to Level 9. It is Remedy being true to themselves with relatively challenging base games and then they crank up the difficulty with their DLCs. I remember Alan Wake‘s DLC, that was a massive difficulty spike.
Control Ultimate Edition is out now on PS5, PS4, Xbox Series X|S, Xbox One, and the PC.